Photographing a Golf Club – Lighting Setup / BTS

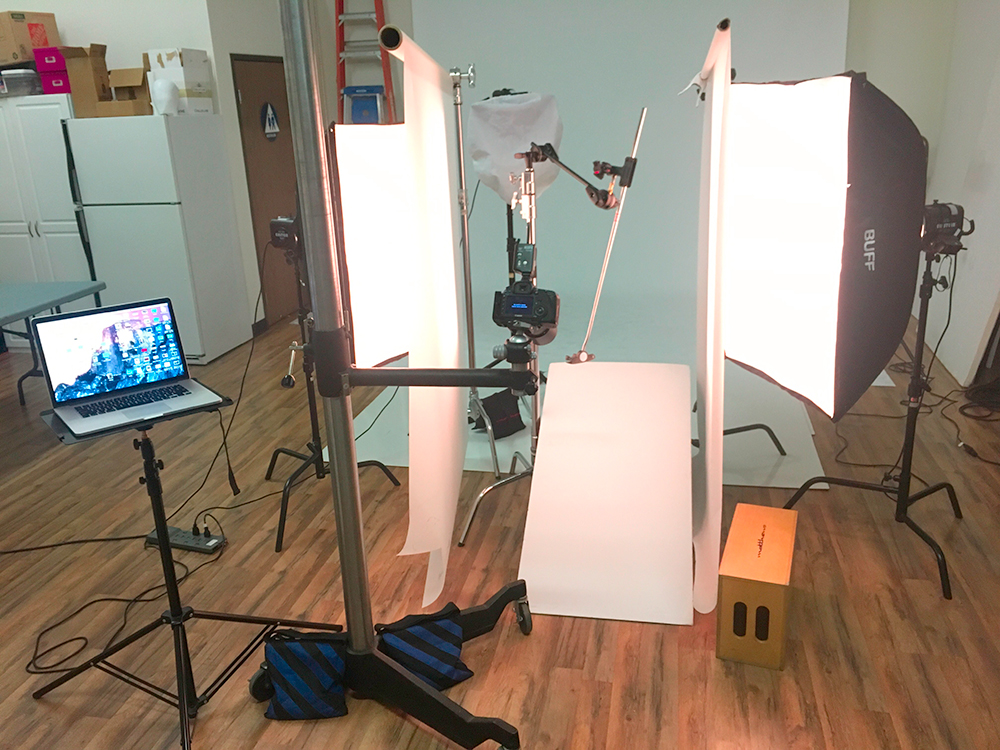
Something from the #protip category today. I had an opportunity to photograph some golf clubs (putters) for Ashdon Golf this morning and discovered the Manfrotto Putter Holder (aka Justin Clamp). It’s intended to hold a small flash, maybe an umbrella and/or other items, but its rubber bushings work great for holding the shaft of a golf club. As you can see its pretty easy to get a consistent club angle like this as well. This setup allowed for astonishingly low cuss rates for a product shoot.

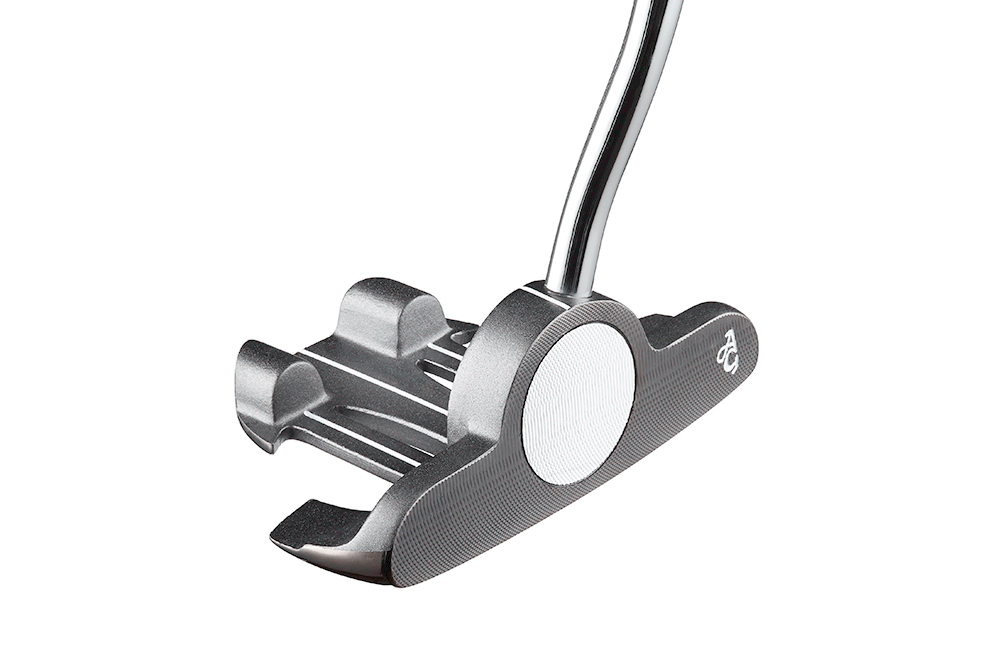
For the lighting setup (above) you can see the two diffusion rolls providing extra softness in front of the boxes. They also allow for a little more flexibility since I can redirect the lights at different areas of the material for different types of clubs without altering the look of the two highlights on the club shaft much. The goal of the lighting is to achieve a clean dual highlight look on the shaft without blowing the metal out completely, maintain lots of texture on the club face and create some interesting gradients on the rest of the club. We want the gradients to transition fairly smoothly from highlight to shadow while still saying “metal” very clearly to the viewer. This setup allows me to pretty much achieve it all in one shot with minimal post production. The piece of foam core leaning under the club serves as my backdrop, and although its very close to white, I will still need to dodge it up to a pure white background in Photoshop. Yes, I could light a pure white background, but its going to splash light toward my lens and decrease my contrast, so its better left to post for optimal results with smaller items like these.

As far as workflow, I shoot tethered to a 15″ Macbook Pro running Capture One so I can view the results, check for dust and fingerprints, etc. as I go. It wasn’t possible to zoom in as close as I wanted and get the whole club in sharp focus at f/16 so I decided to do focus stacks. I shot 3-4 images per item at various focus points using manual focus. I have a focusing rail but for something this size, I simply eyeball it and turn the ring by hand on my 100mm macro lens. After the shoot, I export my RAW source files to TIFF and do my stacks in Helicon Focus. (Helicon seems to like TIFF files, at least it plays nicely with them for me and I prefer to do the basic color work before stacking). After all this, I’ll do my clipping, dodging of the background and final retouch in Photoshop and save as PSD which is more convenient than TIFF for agencies, designers, etc in the Adobe world.
This is a simple clean lighting setup you can do on almost any color of backdrop including clean white knockout with minimal swear words! Thanks for reading.
-RA
